
Step 1 - Find an unobstructed location
Step 2 - Mount Starlink
Step 3 - Mount the power supply
Step 4 - Connect to power supply
Step 5 - Connect to router or ethernet
Step 6 - Connect to power
Step 7 - Connect and set up WiFi (Starlink Router Only)
Step 8 - Test your connection
Mounting
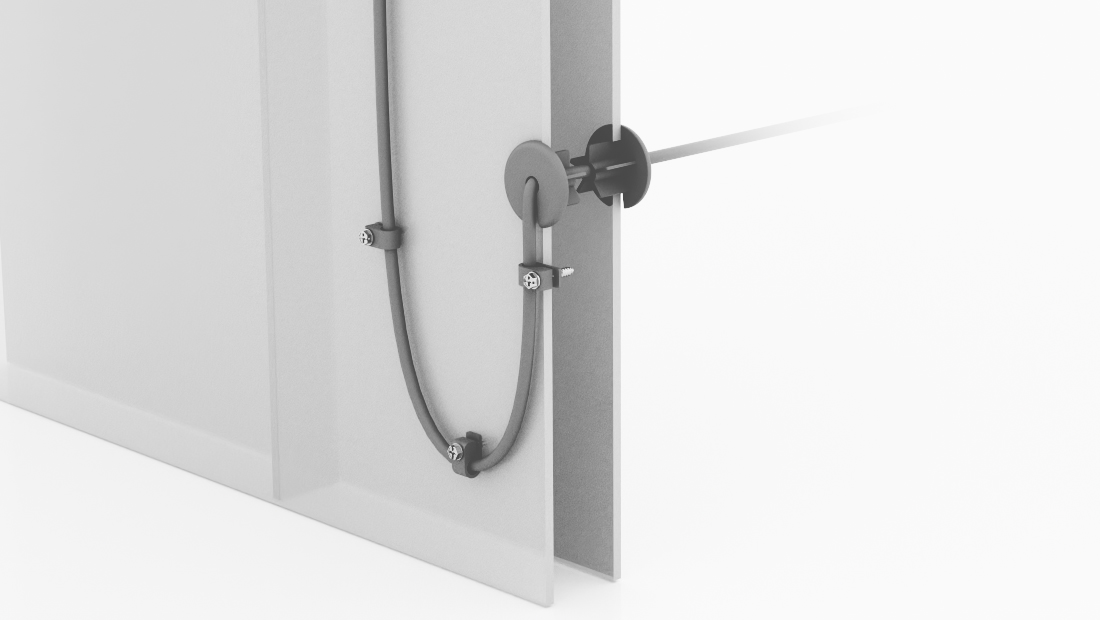
Cable Routing
Starlink Cable Routing Kits
Installing Multiple Starlinks
Connection Monitoring
Maintenance and Troubleshooting
Get Support
Install and maintain your performance starlink in a fixed location
Prepare for Install and Select a Location
Use the Obstructions Tool in the App
Starlink must be 100% unobstructed for best performance. Even small obstructions in the field of view will have a negative impact on the quality of the connection.
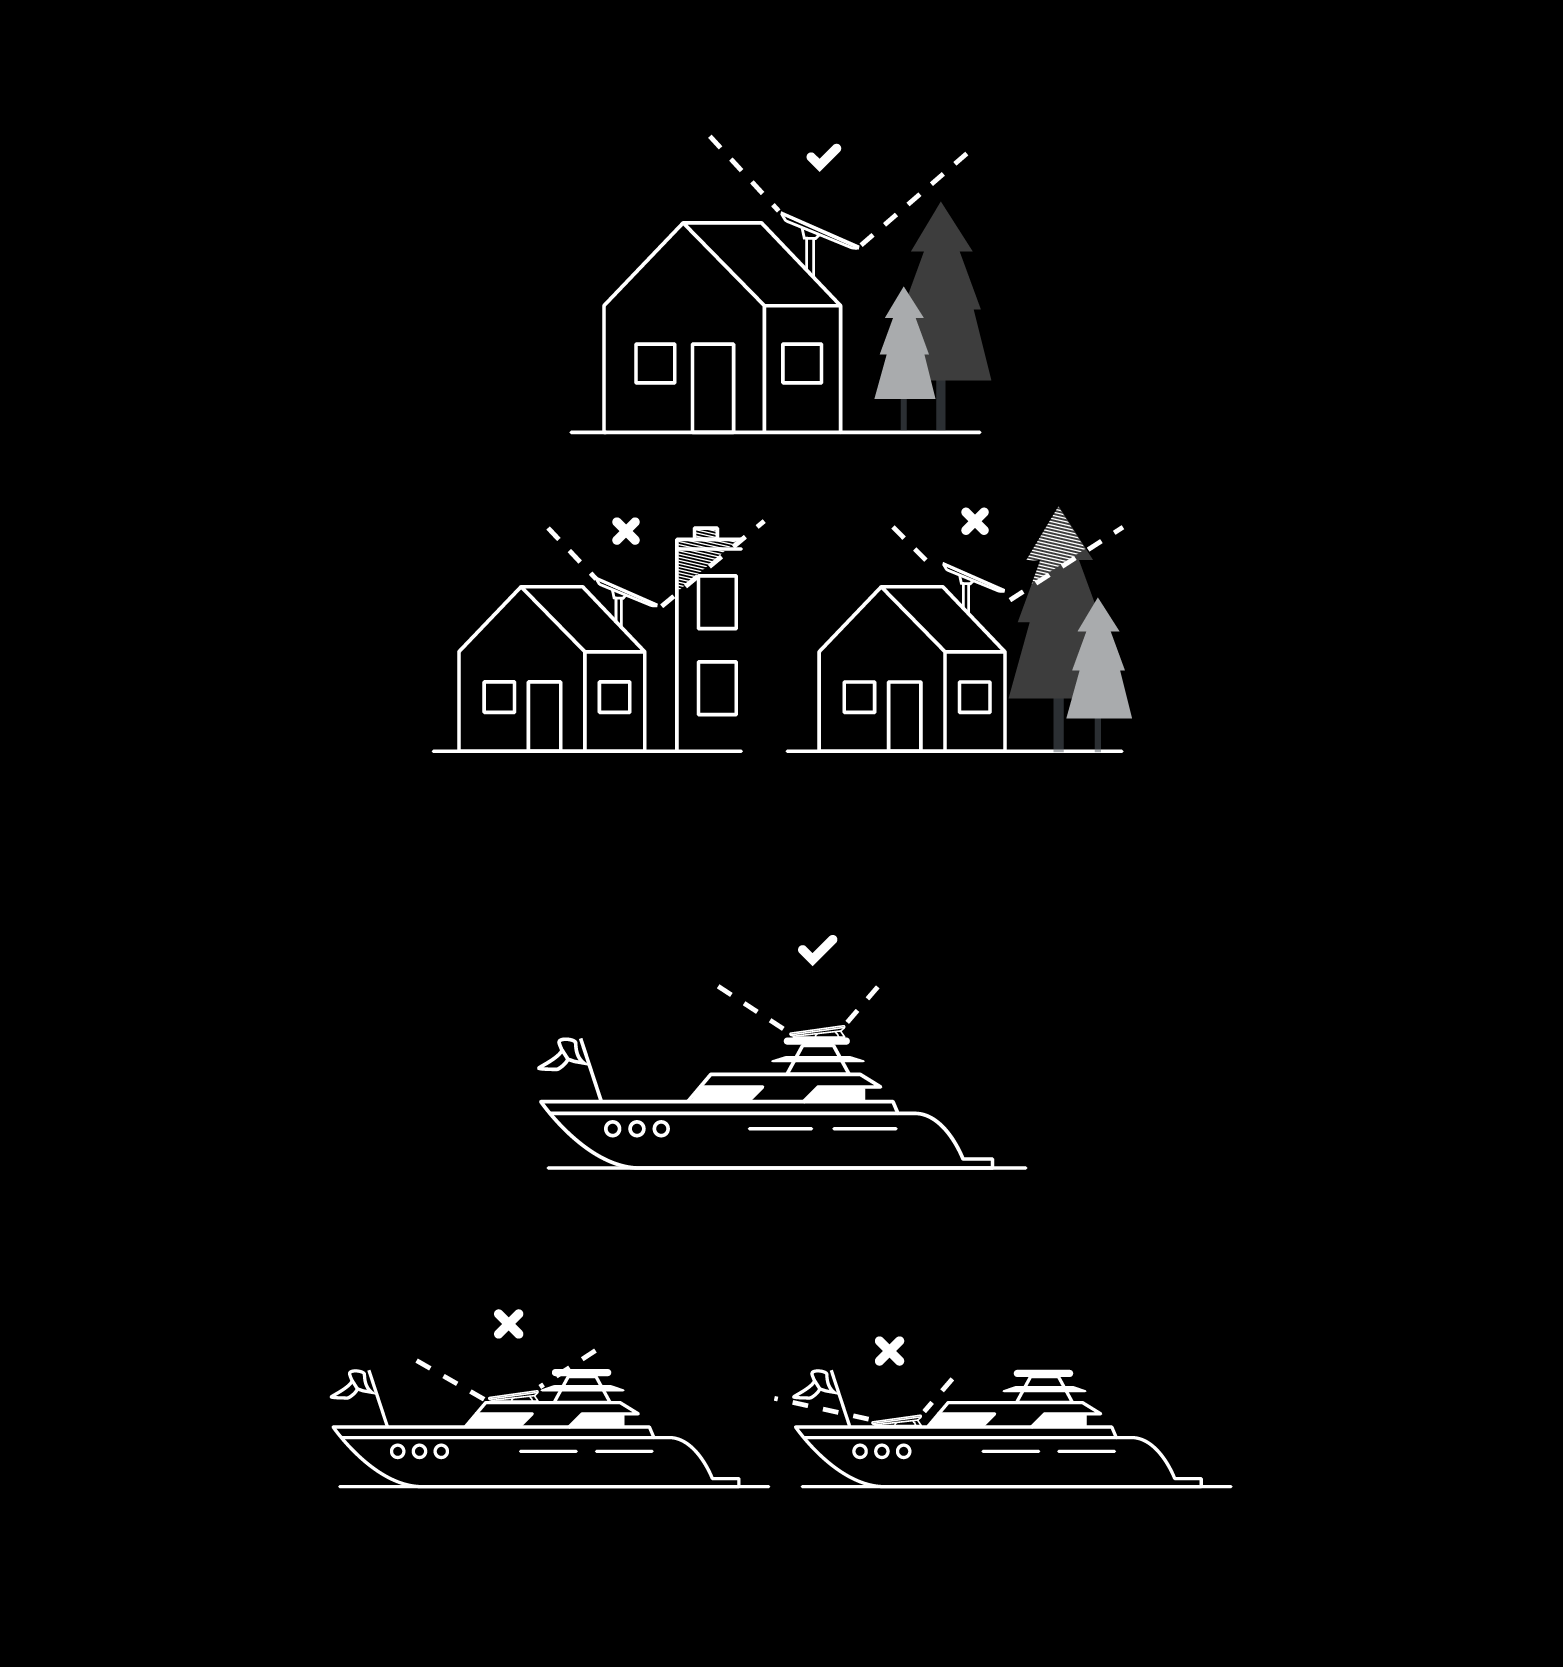
Your Starlink needs a clear view of the sky so it can stay connected with satellites as they move overhead. Objects that obstruct the connection between your Starlink and the satellite, such as a tree branch, pole, or roof, will cause service interruptions. Use the obstruction tool in the App to ensure you have selected a suitable mounting location.
An alert on the App will show if you need to rotate Starlink to be properly aligned. Tap the alert to use the alignment tool.
Ensure to check for obstructions and your Starlink is properly aligned before permanently installing your Starlink.
Read more here
Permanent installation may require drilling to achieve the most secure mount. Alternately, the dish can be clamped to a railing or beam with third-party mounting hardware.
If you plan to use the Starlink Wedge Mount (included with the Flat High Performance dish), please keep the following in mind:
For detailed instructions, reference the Wedge Mount Install Guide.
Mount the power supply using the supplied mount. Be sure the connectors face down or to the side. For the advanced power supply read more here
Connect the Starlink dish to power supply with the provided wire.
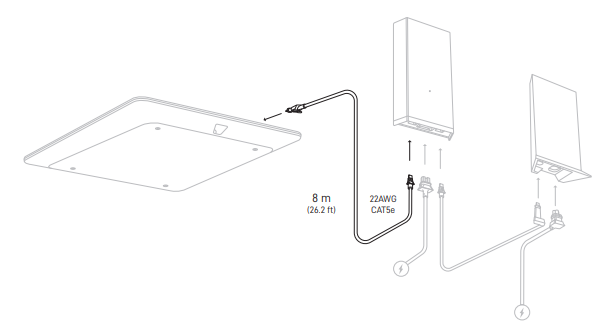
The Flat High Performance kit includes an 8 meter cable. If 8 meters is not long enough for your installation, you can purchase a 25 meter cable in the Starlink Shop. Due to power requirements, the cable from the power supply to the dish can not be extended beyond 25 meters. The minimum bend radius for this cable is 10cm (4").
OPTION 1: Use the Starlink Router cable to connect the power supply to the Starlink provided router.
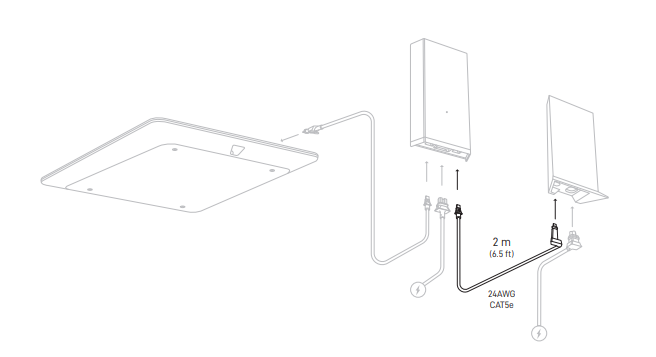
OPTION 2: Use the Starlink Ethernet cable to connect the power supply directly to ethernet port of a device or to a third-party router. Minimum bend radius for this cable is 10cm (4").
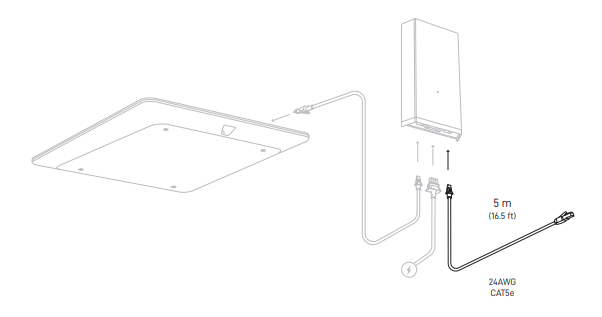
If the ethernet connection cable is not long enough, we suggest terminating or patching the cable. If the connection is outdoors, be sure to use a weatherproof connection. This cable from the power supply to your network is standard ethernet and can be extended up to 100m. Minimum bend radius for ethernet cable is generally 10cm (4").
Use the power cable to connect the power supply and the router (if in use) to a power source supplying AC voltage.
It is recommended to power the Starlink and any downstream router from a power source protected by an Uninterruptable Power Supply (UPS) for the following reasons:
After a few hours of connection, the Starlink app has had time to collect more data.
Mounting your Starlink in a higher location can help prevent obstructions and improve network performance. If you are installing Starlink in a fixed location, use the Pipe Adapter Mount to elevate the dish. Mounting accessories are available for purchase in the "Shop" tab of your Starlink account.
Carefully route Starlink cable from the outside in without significantly bending it or jamming the connector. The dish cable is designed to fold flat to minimize the size of the hole required to pass through the wall. The minimum diameter needed for the cable to fit through the wall is 19.05mm (¾”). Damages to the cable could impact your quality of service so be sure your cables remain free of kinks, debris, or door-jambs. The cable is not rated to be buried or under water.
Longer cables are routing kits are available for purchase in the Starlink Shop.
Cable Routing Kit: Designed for drilling through most walls. Not recommended for masonry, concrete, or hard coat stucco. Best for customers with prior internet cable routing experience and installation; must be comfortable drilling through walls. Kit includes a 3/4" (1.9 cm) spade bit, drill bit, cable routing tool, silicone sealant, grommets, and wall clips.
Tools Needed: Drill, Stud / Electrical Finder
Package Dimensions: 3.75" x 5.25" x 1.75" / 34.9 x 13.3 x 4.4 cm
Package Weight: 0.83 lbs / 0.38 kg
Masonry Routing Kit: Designed for drilling through masonry, concrete or hard coat stucco (excluding EIFS) walls. Best for customers with prior internet cable routing experience and installation; must be comfortable drilling through walls. Kit includes a 3/4" (1.9 cm) spade bit, drill bits, cable routing tool, silicone sealant, grommets, and wall clips.

Tools Needed: Hammer, Hammer Drill, Phillips Head Drill Bit, Stud / Electrical Finder, Goggles, Gloves, and Mask
Package Dimensions: 13.875” x 6.5” x 1.75” / 35.2 x 16.5 x 4.4 cm
Package Weight: 2.1 lbs / 1 kg
Can't find what you're looking for? Contact Support.
Step 1 - Find an unobstructed location
Step 2 - Mount Starlink
Step 3 - Mount the power supply
Step 4 - Connect to power supply
Step 5 - Connect to router or ethernet
Step 6 - Connect to power
Step 7 - Connect and set up WiFi (Starlink Router Only)
Step 8 - Test your connection
Mounting
Cable Routing
Starlink Cable Routing Kits
Installing Multiple Starlinks
Connection Monitoring
Maintenance and Troubleshooting
Get Support